Prepare screen
Find out everything about how to prepare a design for laser processing.
Preparing Screen
Finalize your created job and push it to the laser. Multiple settings to adjust like the Material or the Processing rules.

Pro tip: Press ‘?’ to access the shortcuts. They can be really useful!
This screen has 3 main areas:
- Job list
- Toolbar
- Right panel
Job list


|
Search for a Job |

|
Delete a Job |
Toolbar

 |
Add a new Job |
 |
Import a Job |
 |
Save |
 |
Save as new |
 |
To select an object |
 |
To draw a line |
 |
To draw an ellipse |
 |
To draw a rectangle |
 |
Undo / Redo your last step |
 |
Zoom in and zoom out |
 |
Zoom in on a selection |
 |
Snapping on/off |
 |
Lock laser head off |
 |
Print and cut |
 |
Rotary |
Right panel

The Right panel is separated in 3 areas:
- Production
- Design
- Laser rules
Production


|
Queue your Job at the laser |
|
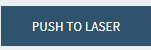
Push your Job immediately to your laser |
Design

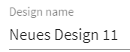 |
Design name |
 |
Inner geometry first |
 |
Adjust skipping overlapping cutlines: – Skip overlapping cutlines: off – Skip overlapping cutlines: Straight lines only – Skip overlapping cutlines: Full |
 |
Add a tag |
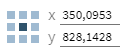 |
Coordinates of the selected object |
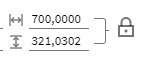 |
To scale the selected object. You can also lock the two values |
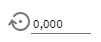 |
Rotation of the selected object |
 |
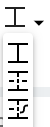
To mirror the selected object |
Laser rules

|
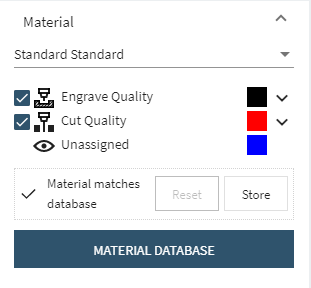
Choose your Material by clicking on Material name. You can quick adjust it or move to the Material Database and create a new Material. |
|
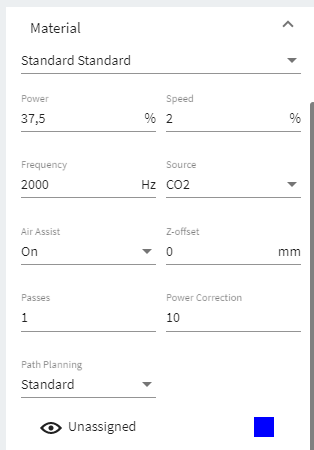
Adjust your laser settings. |
|
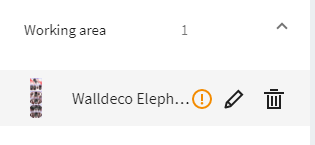
Click on it to adjust your Working area. You can simply adjust it by dragging. |

|
This symbol gives you a warning about an error. |
Shortcuts
-software-keyboard-shortcut-guide-for-laser-cutter-design-and-editing-tools.png?{"image":"https://backend.troteclaser.com/static/images/knowledge/ruby-help/guide/prepare-screen-shortcuts.png","edits":{"resize":{"width":940,"fit":"cover"}},"outputFormat":{"format":"webp"}})
Updated on 13. September 2021

